Go: Working with JSON
Go: Working with JSON

I recently received my AWS Solutions Architect Associate Cert, and I inadvertently learned more about Ops and DevOps in respect to automation, deployment and most importantly secrets and access. So I wanted to share my knowledge on creating short lived credentials for database users and administrators. In that vain, this blog post is the lab setup for a Secrets management post that uses Vault.
The blog post for a tutorial to rotate database credentials via Hashicorp Vault can be found here
In this blog post, the term Vault will be used to refer to Hashicorp Vault
This blog post will cover:
Requirements:
For the lab setup will include:
Both the RDS database and EC2 instance will be created in the Ohio region:

It is best practice not to use an AWS root account, as such a new user will be created, a policy to access EC2 and RDS will be applied to the new user.
The new user having only access to EC2 and RDS and nothing else is in alignment with the principle of least privilege.
AWS documentation for creating an Administrator user that is not ROOT can be found here: here
The below instructions will create a new user with only the correct permissions to access EC2 and RDS
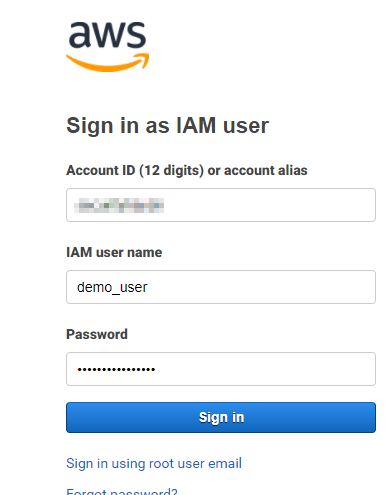
Sign into the root account in AWS:
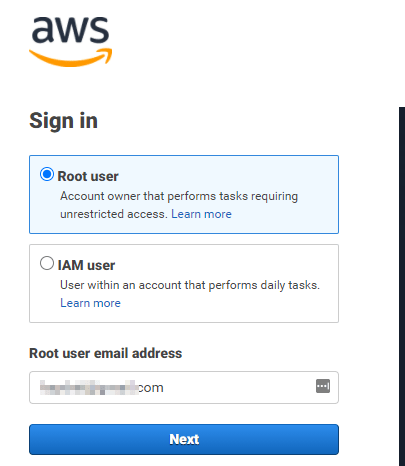
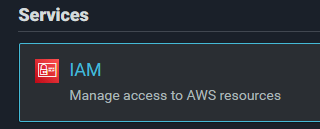
Go to the Identity and Access Management section:
Select Users and click add users
Create a new user:
Check AWS Management Console Access
Create a custom password
Uncheck the User must create a new password at next sign-in
It should look like the below image:

Click Next:Permissions.
Ideally, in an organization there would be groups that the user could be placed in. However for this tutorial and testing we are going to attach existing policies to the new user directly.
The Permissions page will look something like:
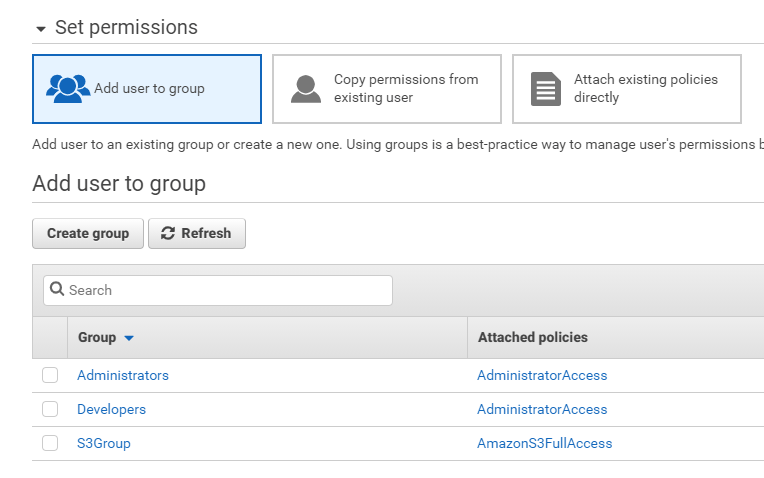
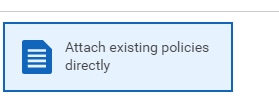
Please select Attach existing Policies Directly:
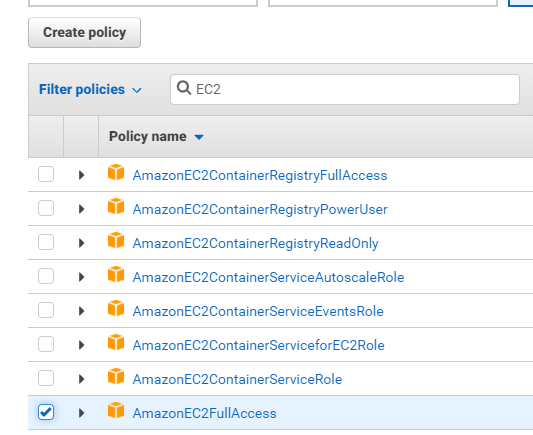
Within the ‘Filter policies’ section type EC2, and then choose AmazonEC2FullAccess.
This will give the user admin access over the EC2 service. The AmazonEC2FullAccess can be seen here:
 ”
”
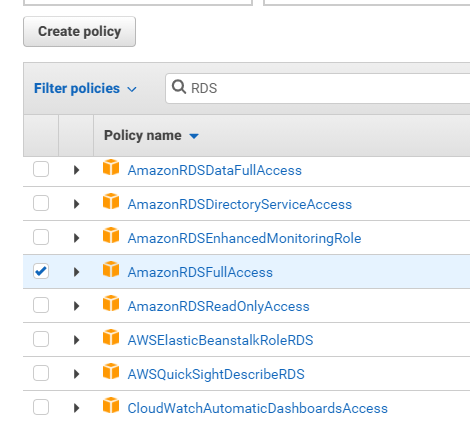
Now the EC2 permissions have been attached, the RDS permissions should be attached. Within the Filter policies section type RDS, and then choose “AmazonRDSFullAccess”.
The AmazonRDSFullAccess can be seen here:
Click Next:tags, and then click Next:Review.
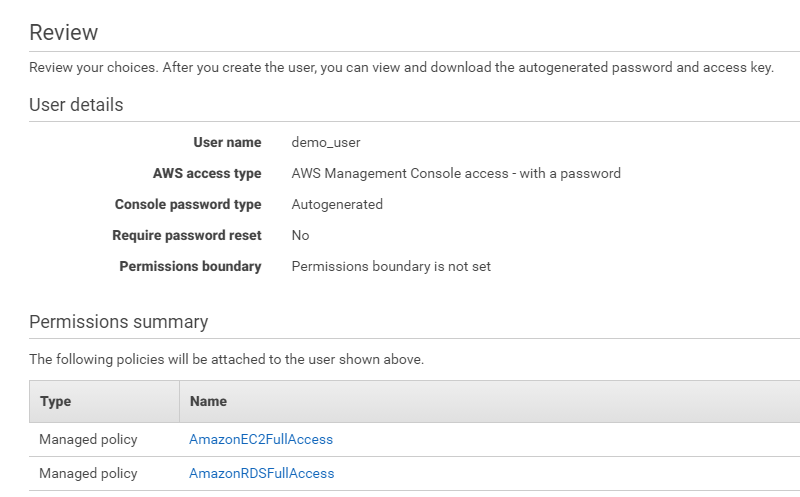
In the review page, ensure the permissions summary includes:
It will look like:
Click Create user, and the user should have been created.
The success page will look like:
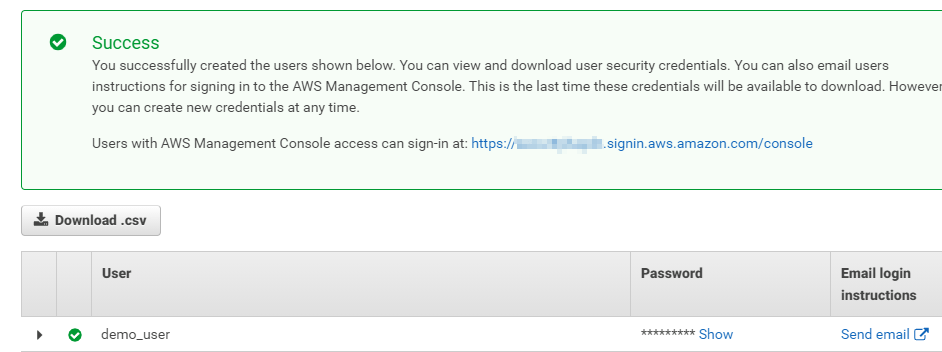
Please take note of the sign-in address
Now the a non-root user has been created (least privilege), the rest of the setup will take place as that user. To login, follow the steps below:
Use the sign in link shown in the success screen from creating the user to login:

Login with the new users credentials:
The infrastructure will include a MySQL server hosted on the AWS Relationship Database Service. The steps below will go through setting up one:
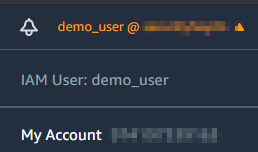
Ensure you are signed in as the non-root user:
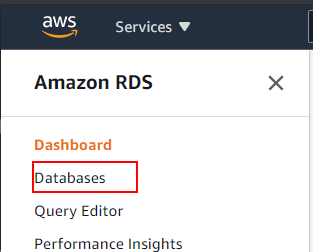
Go to the Amazon Relational Database Service:
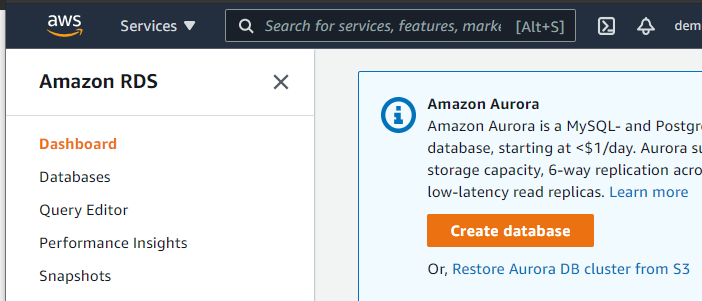
Once on the RDS section, the next steps are:
It will look like:
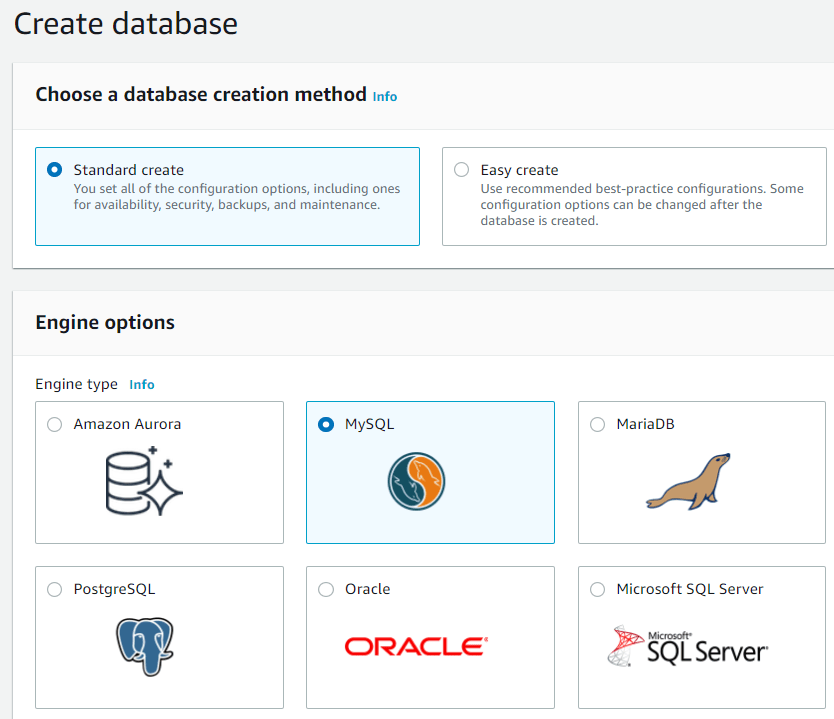

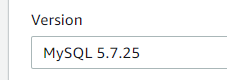
Choose a MySQL version of 5.7.x:
Name the database within “DB instance identifier” and create an admin password:

Settings for the database:
Ensure Public access is set to no.
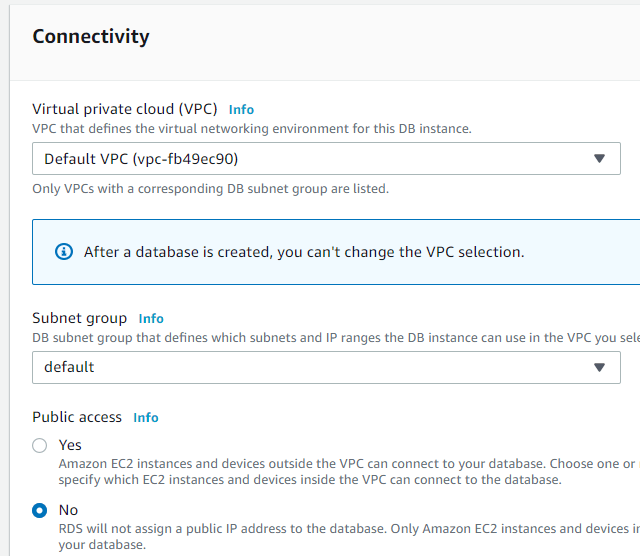
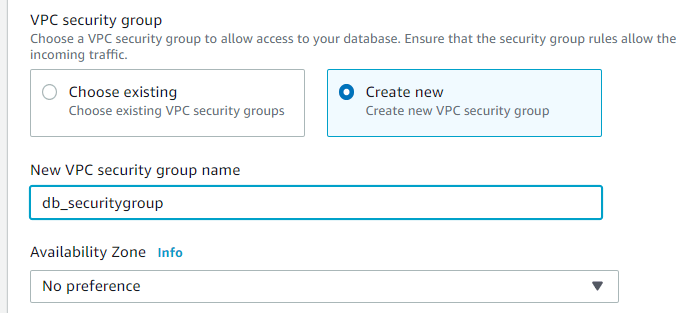
For VPC security groups select “Create new” and give it a name. We will edit the RDS security group later, to allow only traffic from the Security Group the EC2 server is in.
Ensure database authentication is set to password authentication (this is by default).
Then select Create database:
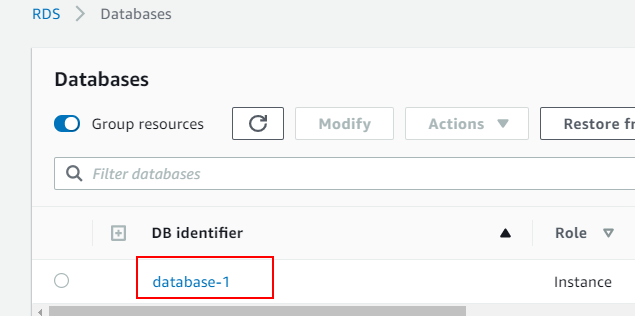
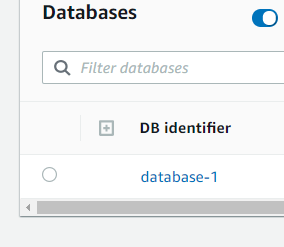
The database will show up within the Databases section
This section is for creating the EC2 instance/server that will be used to host Vault and connect to the MySQL RDS server.
For these steps please ensure you are logged in as the non-root user again.
Go to the EC2 service:
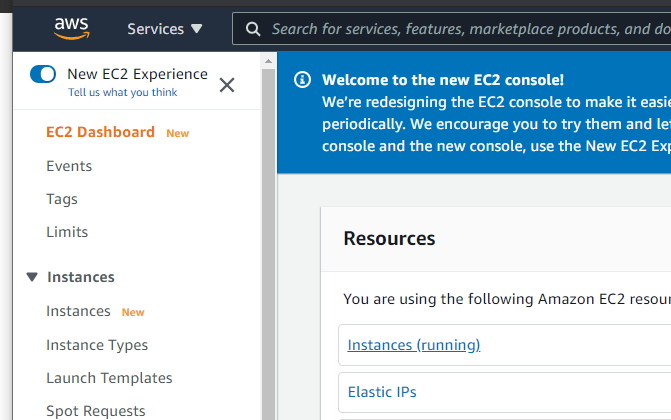
Click “Launch Instance” on this page to begin creating an EC2 instance:
Within “Step 1: Choose an Amazon Machine Image (AMI)” type Ubuntu and press enter:
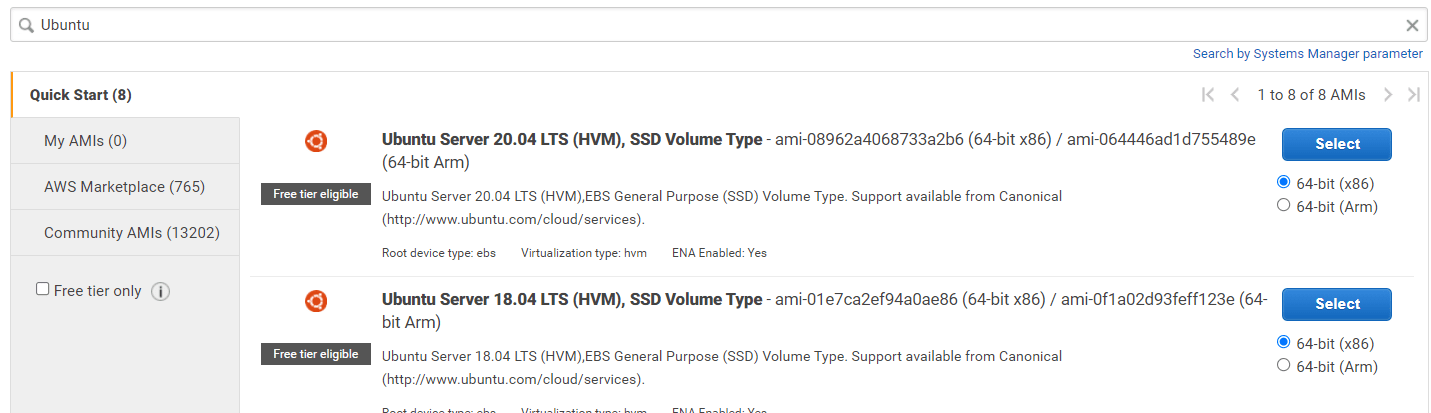
Choose either of the Ubuntu servers (18,20) and click select. Ensure you choose the “free tier” eligible ones.
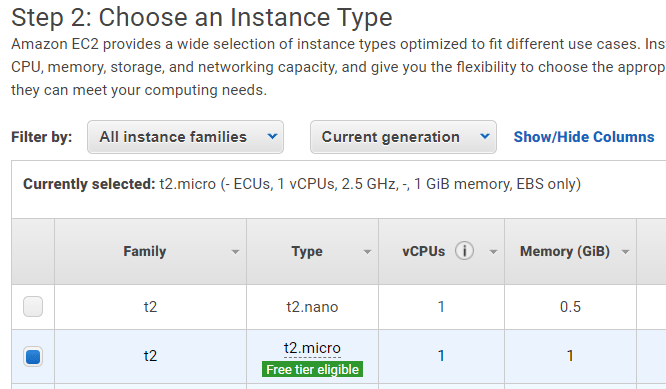
Within “Step 2: Choose an Instance Type” Choose the free tier option and click “Next: Configure Instance Details
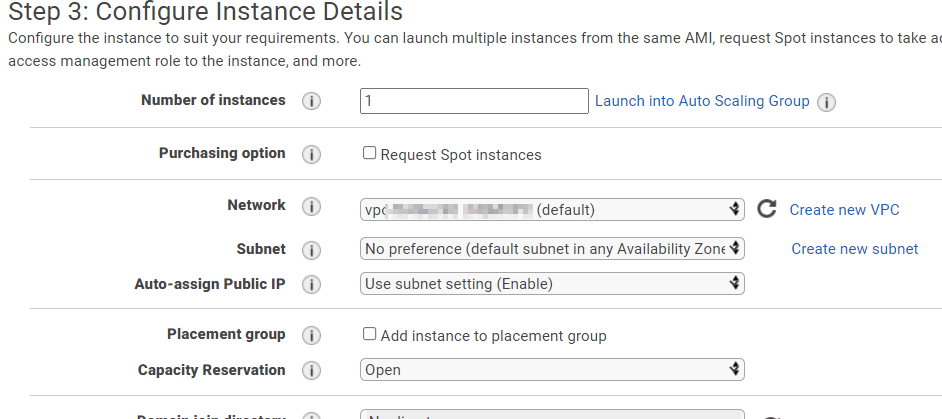
Within “Step 3: Configure Instance Details” ensure the default VPC is chosen. All default permissions are fine, click “Next: Add Storage”:
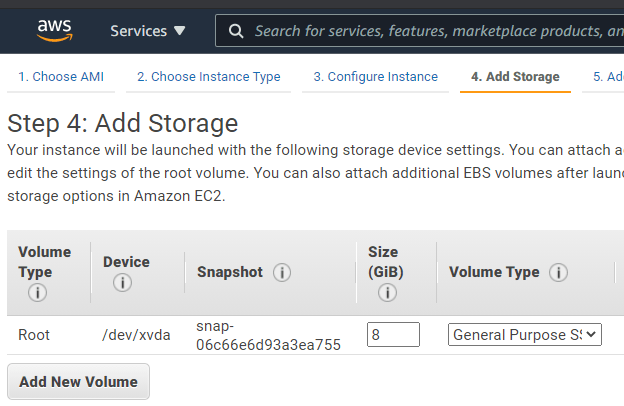
Within: “Step 4: Add Storage” keep all default options and click “Next: Add Tags”:
Within “Step 5: Add Tags” click “Next: Configure Security Group”:

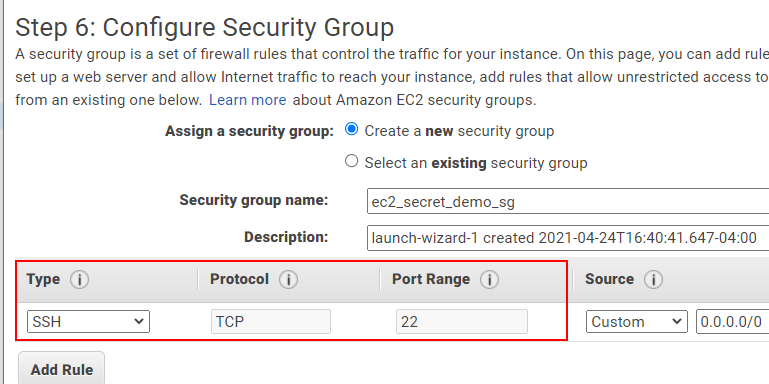
Within “Step 6: Configure Security Group” you may be able to select a default security group. But for this tutorial we are going to create a new security group and name it “ec2_secret_demo_sg”.
Ensure the port 22 is allowed:
Now select “Review and Launch”
Within “Step 7: Review Instance Launch” ensure the settings are correct and then click launch.
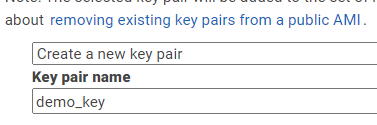
It will ask you to use an existing key pair or create a new key pair. I have created a new pair called demo_key:
Download the key and then click “Launch Instances”. This take you to a “Launch Status Page”, click “View Instances”.
From here, it will take you back to the EC2 main page, and you should be able to see the instance running like so:
Once the EC2 has been created, it is a good idea to test that the key pair works and you can login.
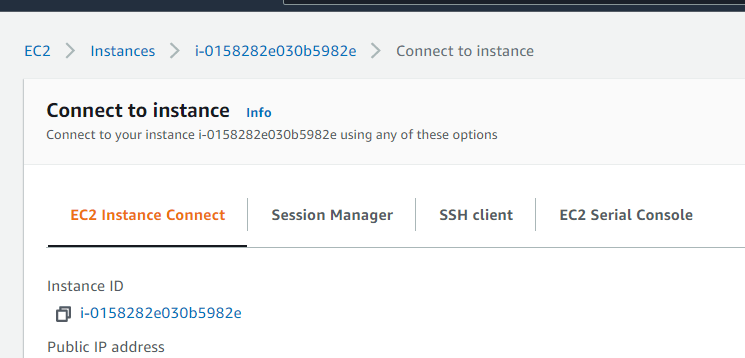
Select your instance, and then click connect:
Select SSH client and read the instructions. The most important part is the connect example, which can be copied and pasted into a terminal to test access:
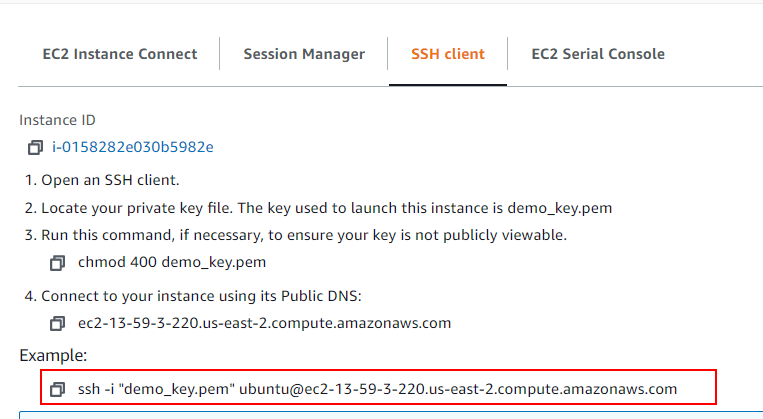
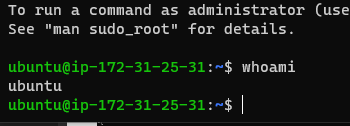
Attempt to login with your key pair and instance Public DNS like so:

Successfully logging in will give an Ubuntu command prompt:
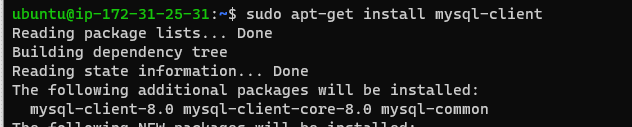
The EC2 instance needs the mysql client installed so that it can connect to the MySQL RDS database.
When logged onto the EC2 server please install the client with:
1
sudo apt-get install mysql-client
When creating the RDS database a new security group was created. This security group needs to be configured to allow the EC2 server to connect to it.
Attempting to connect from the EC2 server with the mysql client will not work, and will simply hang like so:

To fix this, the the Security Group for the database needs to be configured.
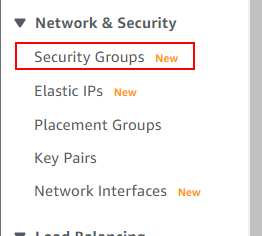
The easiest way is to go to the EC2 service and select Security Groups, this is under Network and Security:
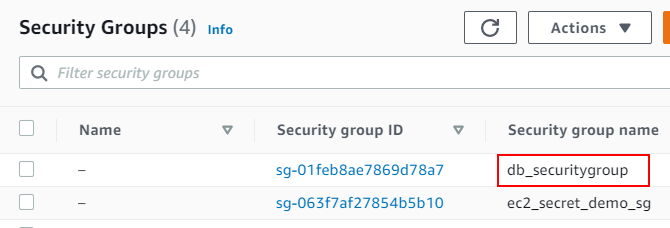
Select the Security Group that the RDS database is using, in the tutorial it was called “db_securitygroup”:
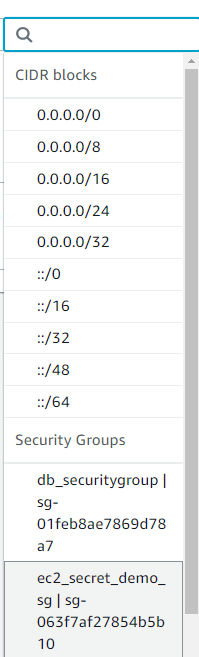
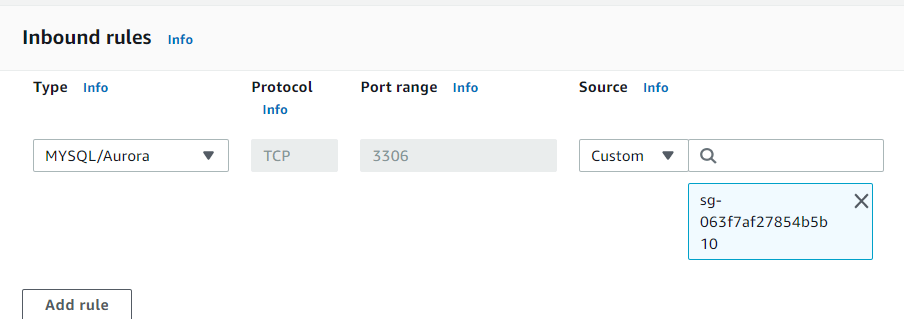
Edit the Inbound rules and under source select the EC2 Security group, which in this tutorial was named “ec2_secret_demo_sg”:
If selected correctly it will look like:
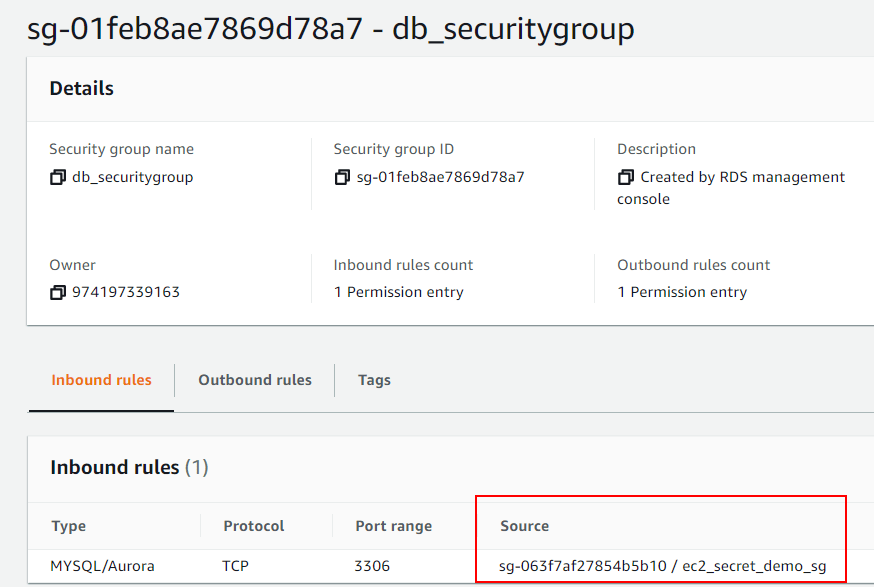
Click “Save rules”, and the next page will show the db_securitygroup rules. The rule you updated with the EC2 Security Group should be showing:
Now that the Security Group for the RDS database allows connection from the EC2 servers Security Group, we should test that it works.
AWS documentation for connecting to a MySQL RDS database is here.
The command to connect from the mysqlclient is:
1
mysql -h <RDS endpoint> -P 3306 -u <username> -p
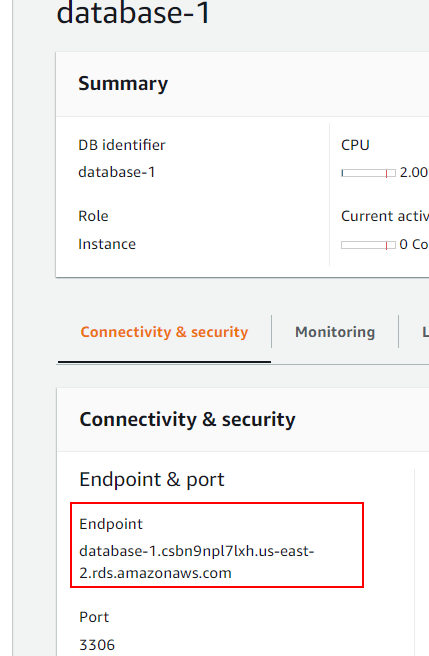
To find the endpoint of the database, go to the AWS RDS service and select the database:
Select the database within Databases:
Under Connectivity and security will be the endpoint:
For this tutorial, the MySQL RDS server, the command becomes:
1
 mysql -h database-1.csbn9npl7lxh.us-east-2.rds.amazonaws.com -P 3306 -u admin -p
Enter the password you gave for the user and login
If successful you will see a banner and mysql prompt:
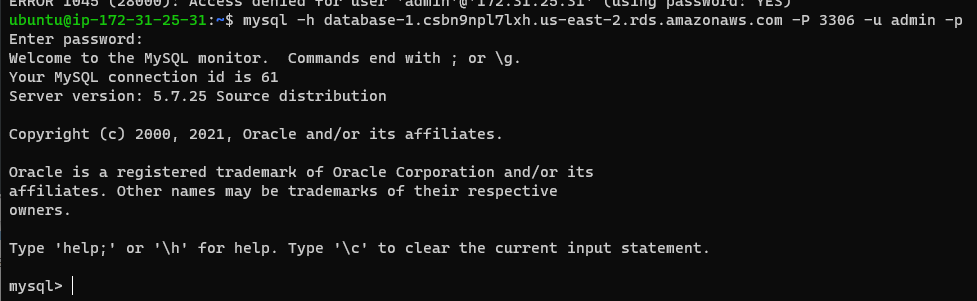
Congratulations, you have created an EC2 server, a MySQL RDS database and connected to the database.
Again, this is used as the infrastructure setup for the tutorial on configuring Hashicorp Vault to rotate database credentials.
That can be found [here](here
Go: Working with JSON
TL;DR Using short-lived secrets to access a database is much more secure than standard credentials
I recently received my AWS Solutions Architect Associate Cert, and I inadvertently learned more about Ops and DevOps in respect to automation, deployment an...
This post will cover the following: Connecting to Splunk with the Python SDK, executing a search and receiving the results Connecting to Splunk without ...
TL;DR: Create Logstash conf.d file to allow Winlogbeat to be ingested into Logstash. Change Winlogbeat config file to use Logstash instead of Elasticsearch.
TL;DR Enable-PSRemoting Invoke-Command
I have been working on Windows and needed to connect to a Network Interface (NIC). I ran into problems, here is what I learned and hope it saves the same tro...
I have been using tcpdump recently and wanted to note down some of the commands Y’know, for future reference.
Today I was trouble shooting a machine at work. I did not have access via RDP or VNC, so I used SSH to forward my traffic to the host so I could access a URL.
I participated in a DevSecOps type workshop on Saturday (May 9th) in which we created some GitHub Actions. This is a post to solidify the learning and be a c...
This post is a cheat sheet for removing values from a Slice (technically creating a new slice).
On April 25th I was fortunate enough to participate in the Trend Micro Threat Defense workshop.
Since I blogged about my experience at OpenSoc, I wanted to expand on the value I found in my eLearnSecuirty Incident Response course. What you will find bel...
So Thursday (April 9th) I participated in an online blue team defense simulation event, known as OpenSOC.
I have been working with Golang strings and how to manipulate them. Working from other blogs posts I’ve found. When I sit down to code, I seem to forget ever...
its workings
You’ll find this post in your _posts directory. Go ahead and edit it and re-build the site to see your changes. You can rebuild the site in many different wa...
Blog from home installed jekyll on home PC, pulled GH repo. done :) (not that easy)
2nd blog post this is some wording